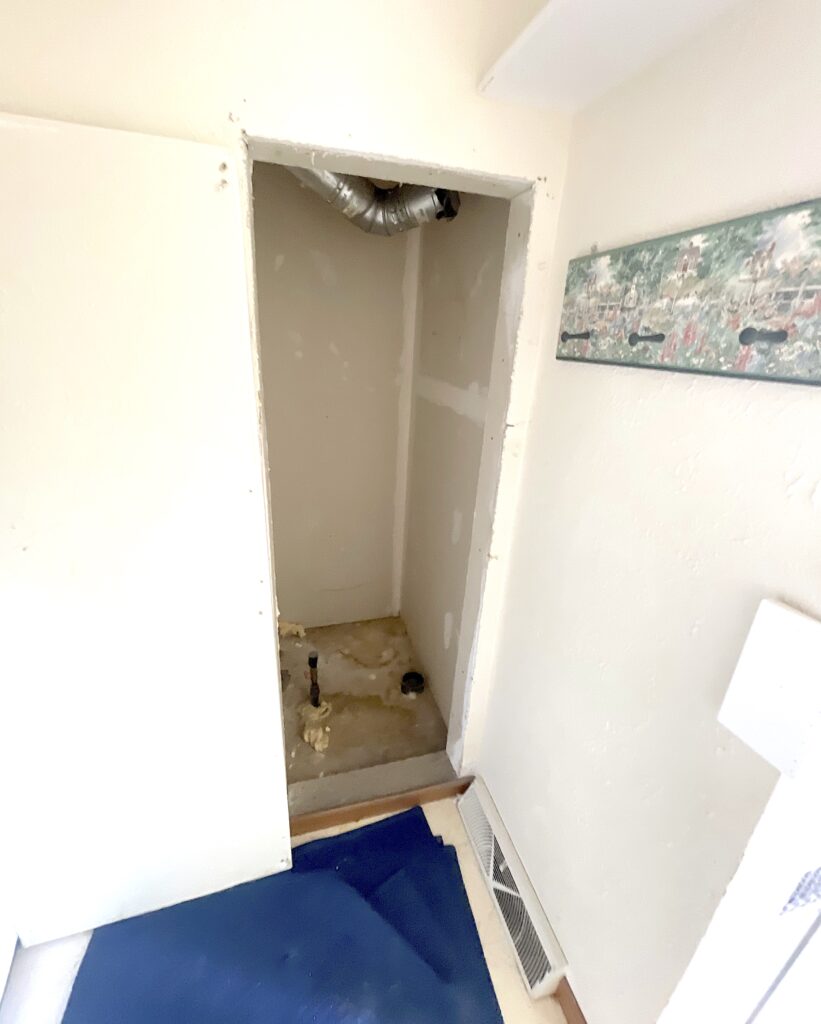
I’m taking on a project where I’m converting an old water heater closet. A few years ago, we removed the water heater from this closet and put a new power-vent unit in our basement. We decided to just leave the access panel over the opening until we were ready to convert it to a shoe closet.
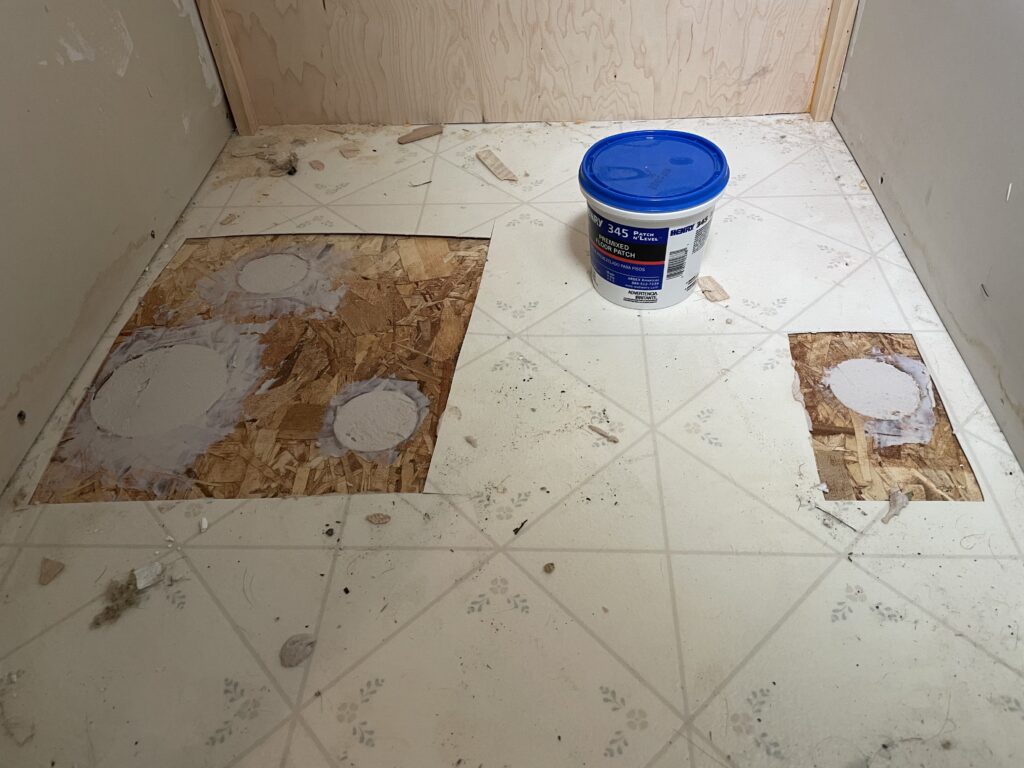
The 4 holes in the floor needed to be patched. I screwed and glued plywood underneath the holes and filled them with some Henry floor patch. There’s also a hole in the ceiling that I patched with drywall.
The access panel was much smaller than the 24×80 pre-hung door that I planned for. I used the Milwaukee M12 3-Plane Laser to lay out the new opening. I ended up cutting the drywall on these green laser lines and installed 2×4 framing inside the drywall.
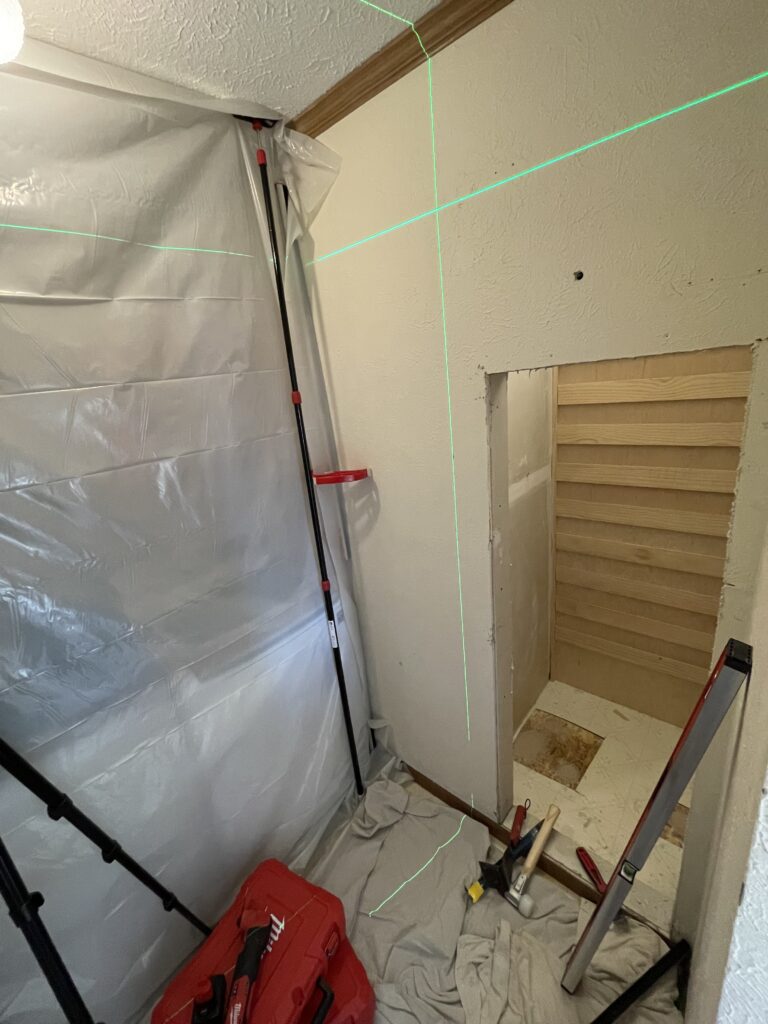
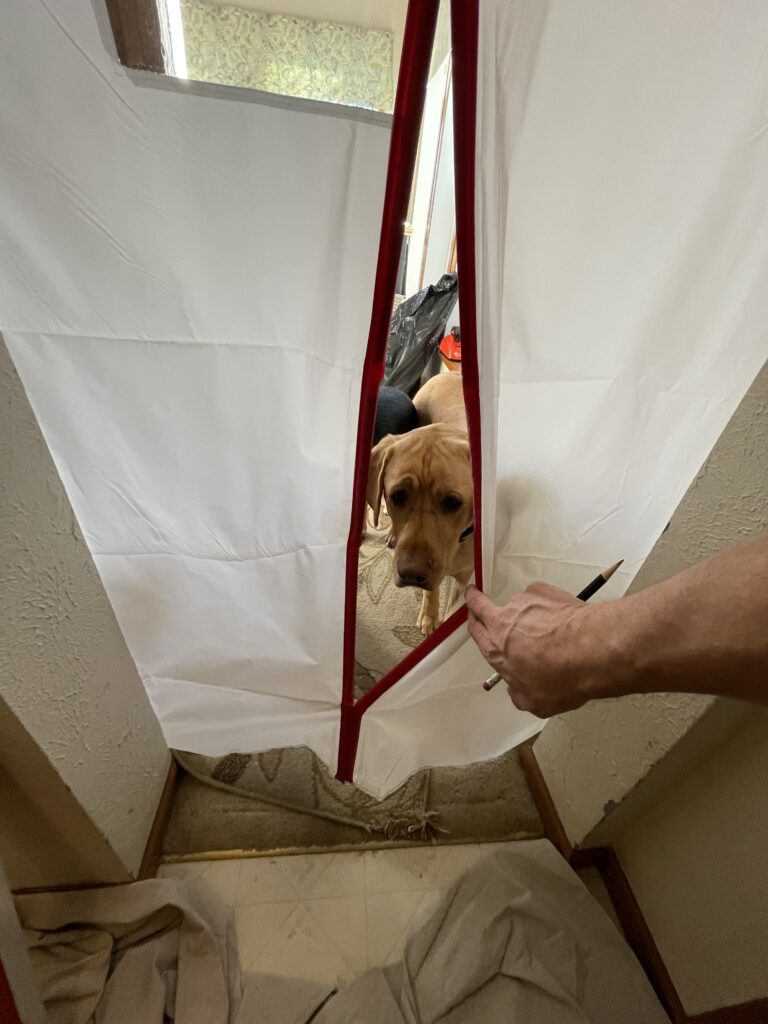
I had quite a bit of dust from the drywall cutting. I used a Milwaukee M12 Oscillating Multi-tool with a drywall multi-blade, which works awesome. I contained the dust with my Zip Wall Dust Barrier System and Magnetic Door Kit. Oakley was able to peek inside the laundry room and see what I was up to.
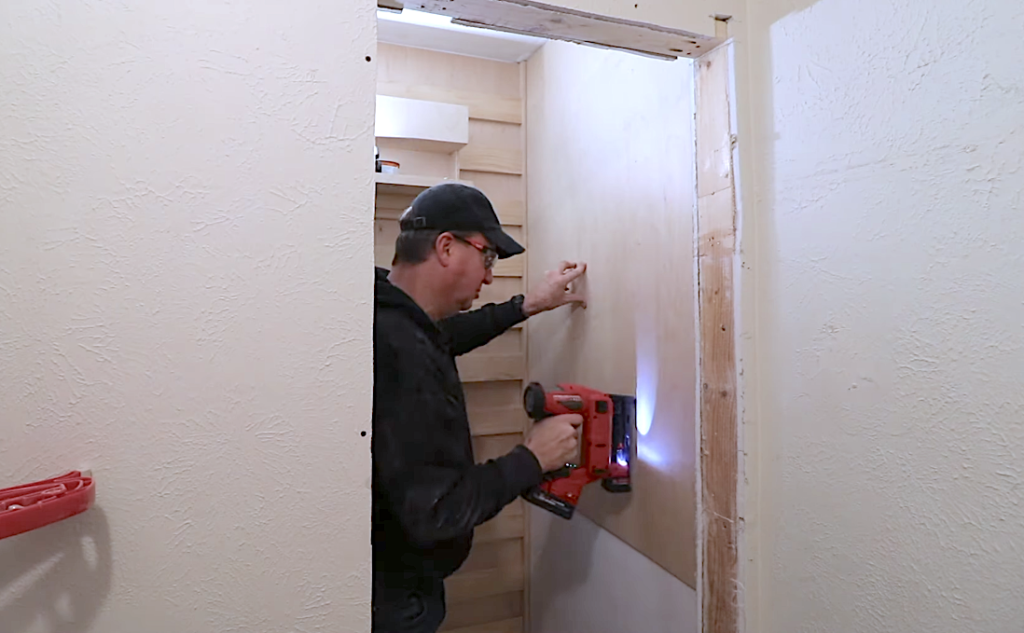
The last item that I was able to complete in this segment was tacking up some 1/4 in. birch plywood. I installed it on the right-hand side of the closet to match the back, which was done in an earlier video. The Milwaukee M18 FUEL 1/4 in Narrow Crown Stapler worked well for securing the plywood in place. I’ll add French cleats later on that match the ones on the back wall.


